


")
")


")
")


Get more Followers on Twitter with this App
Important note – This guide will teach you an almost passive way of growing your Twitter following. If you’re looking to do just that but don’t have the time and resources to do it yourself, then this guide is DEFINITELY what you need.
Let’s face it, no matter how you look at it, the overwhelming impact that social media can do for your business can be quite a game changer. This is especially true with Twitter where the platform already has a massive 645,750,000 active registered users (estimate).
It’s quite mouth watering, isn’t it? Even if you’ll just get 1% of the figure that I shared above, you’re pockets will be bursting with money!
Because that’s the kind of benefit Twitter can bring to your business, I’d like to share with you a tool that I’m using to grow my Twitter following.
This set-it-forget-it tool will help grow your likes, favorites, and followers while you’re sleeping or basically doing something else. You just have to set it once, and it’ll start working for you like clockwork.
Set it and Forget it, With Twibble for Twitter!
So what tool am I talking about – Twibble!
Twibble.io has been my secret to growing my follwing since it allows me to Tweet HIGHLY RELEVANT posts passively.
I’ll share with you a walk through on the basics of using Twibble. Once you follow my step-by-step guide, you should be able to start growing your following in Twitter and your brand’s recognition.
Getting started with Twibble
Here goes.
1.) Go to their website Twibble.io and register using your Twitter account.
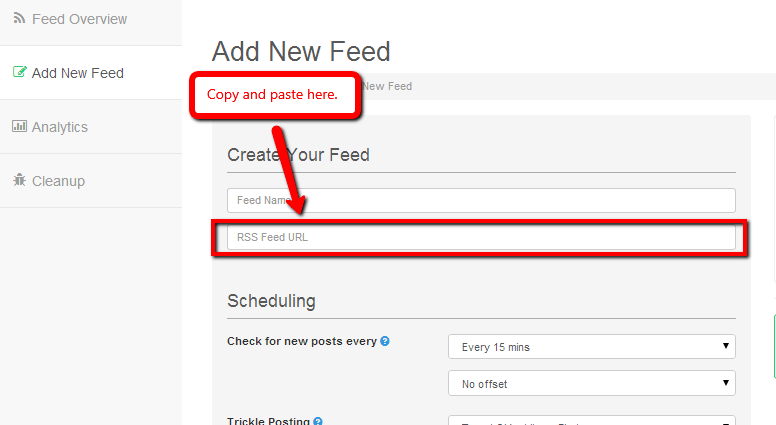
2.) Once you’re registered, click the “Add New Feed” section.
3.) Enter all the information asked on the “Add New Feed” page.
4.) Press the “Create” button and you’re good to go.
That’s about it! You’re good to go and the feeds from those sites with the filters that you added will be automatically posted on your Twitter account.
A couple of things before we end this guide…
Looking for a site’s Feed URL
If you aren’t quite familiar with how to get a site’s “RSS Feed URL” (which is required as the second info that you need to type in), here’s how to do it.
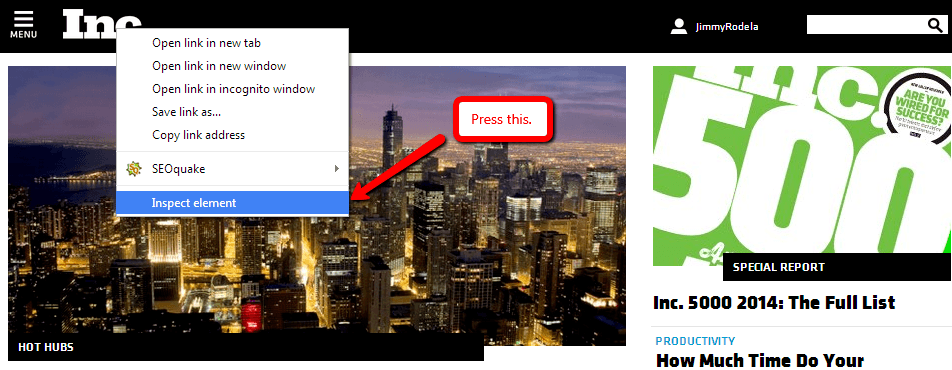
1.) Go to the website that you want to add. Let’s use Inc.com.
2.) Right click on the website’s logo and press “inspect element”
3.) A box will appear at the bottom part of your screen. Press cntrl + F on the box then use “Rss” as your keyword. You may have to press “enter” a couple of times until you find it but it will surely take you to the RSS URL.
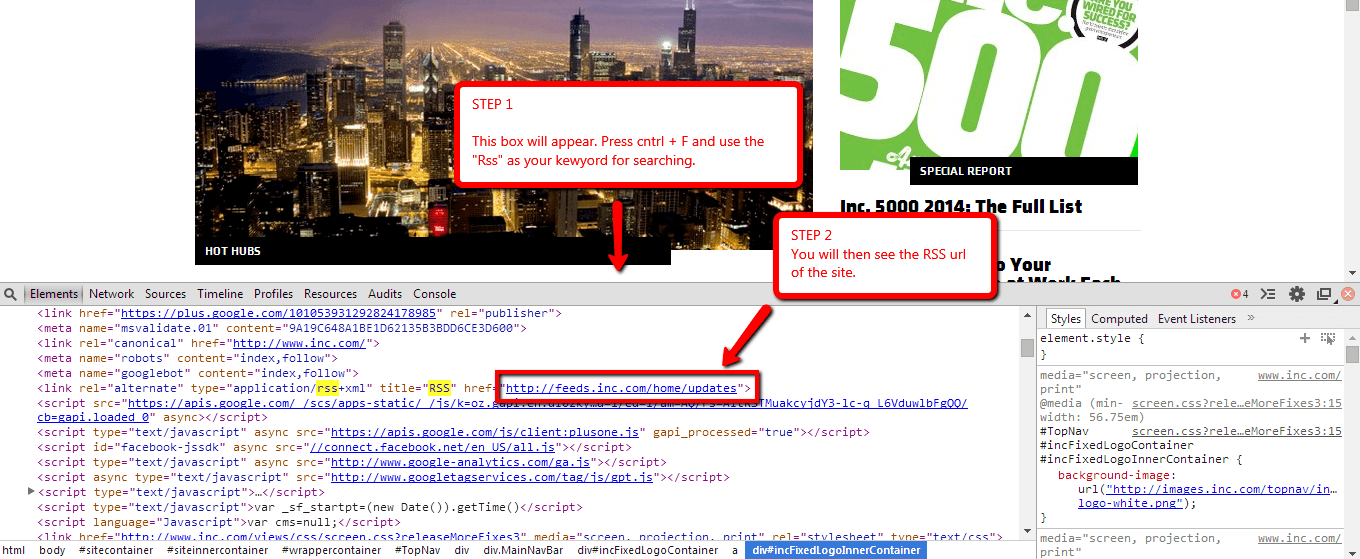
4.) Copy and paste the entire URL then add it on the second box on your “Add New Feed” page.
About adding Filters
This is the box that I’m talking about when I said “Filters”.
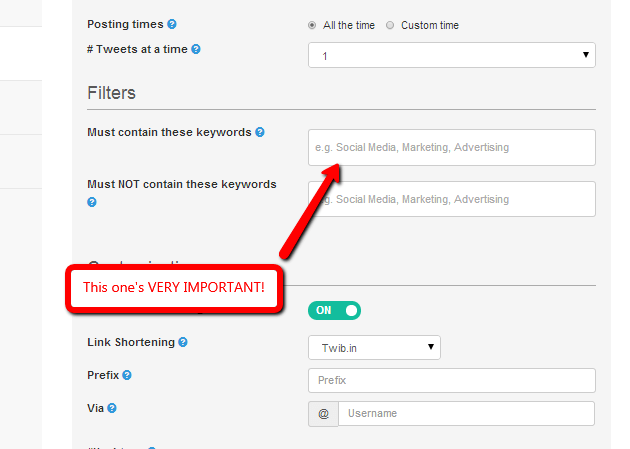
I cannot stress to you how important adding a filter is.
This can spell the difference between you outright spamming your audience or sharing with them valuable content that they’ll love.
The filters make your posts laser focused on what your target audience like to read about. If you’re in the health niche, then you should add health related keywords. This ensures that Twibble will ONLY POST articles that contain the keywords that you added on your filter.
If you don’t add any filters, Twibble will outright pull whatever posts will be published on the site whether it be business, real estate, health, or marketing (among many others).
Customization
Be careful with your customizations. Here are the points that I’d like you to consider before tinkering too much with it.
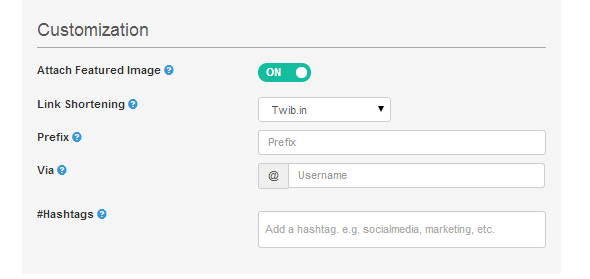
1.) Don’t add too many hashtags since the number of characters of the posts’ title will be shortened. As you may already know, if your posts title as a very limited number of characters, your readers won’t be able to tell what the post is really all about.
2.) Make sure that the “Attach Feature Image” section is ticked on. Though that is the default setting.
It’s your turn to share!
Whether you have questions, ideas, or other tools that you’d like to share, please do so in the comments section below.
I hope to hear from you soon. Cheers!
")

