If you have noticed a recent slump in your Macs otherwise normal ‘va va voom’ performance it may be due to your not having enough memory / RAM. This is especially a problem when you’re running Windows on Mac, as you’re now sharing your Mac’s resources with another OS. Speaking of running Windows on Mac, this article is actually part of a series on “How to Install Windows on Mac”, so if you have other questions involving the process you can peruse through this series whenever you wish.
Signs that you may need more memory include:
- Programs are taking longer to respond or longer to open.
- Display problems begin happening, such as when you try to load a page and it only partially loads or refuses to load all together. You also may see a blank space where the data should be.
- When you try to open anything, or even start your Mac, the system will not respond.
- System notifications that say “low memory” or “out of memory.”
If you’re experiencing these problems, there are a few things you can try though before jumping right into an expensive RAM upgrade. So, let’s explore those first and see if they will work for you.
RAM Upgrading Alternatives
So, what can possibly be an alternative to adding more RAM to your Mac? There are actually a few things you can try and most involve starting with your hard drive. By cleaning up your hard drive, which means making some more space on it, you then give your Mac more RAM to work with as it’s now not all tied up with a bunch of useless junk.
To start doing this you can try some free ways first and if you’re still noticing a slow down you can move onto using some inexpensive programs that will help too. You can do both as well, which is the best approach, and the minor amount you will end up paying for the program will far outweigh the cost of purchasing RAM and having it installed.
Do it Yourself Cleanup
Take Out The Trash: To start with, you can just go through your applications and start identifying which ones you no longer need or use. Move these to the trash or if they have an uninstall option, use that. When you do delete these apps you still leave a lot of bits and pieces behind, so it’s good to grab a program that will delete them completely for you, such as AppZapper or MacKeeper. When you’re done, make sure to empty the Trash bin.
Widgets: Next, go into your Widgets. These little buggers can take up a lot more room of your resources than you think. To do this you can click go to your dashboard, in Lion click on the Mission Control icon in your Dock and then Dashboard. Once your Dashboard is up, click on the small X in the lower left corner. This will bring up your Widgets and Manage Widgets. Click on Manage Widgets and you can now choose which ones you want and don’t want.
Junk in the Trunk?: You may notice a big difference in your Mac’s speed and processing abilities by getting rid of languages you don’t need, cleaning and emptying your cache, log history, and duplicates. To do some of this you can use Terminal with some commands, but easier and safer you can take advantage of some free or cheap apps that will do it for you. Unnecessary languages can especially take up several gigabytes of space, for that you can use Monolingual and it’s free. To get rid of the languages and everything else cluttering up your Mac’s “trunk”, you can use one of the Mac cleaners listed in the next section.
Free or Cheap Apps to Clean Your Mac
These free and cheap apps include AppZapper, MacKeeper, CleanMyMac, Speed4Mac, and Onyx. If they’re not completely free, they do offer a free trial which is definitely worth a try. Even with the trial you can at least eliminate a bunch of junk you don’t need and free up some amazing space on your Mac. When I used these cleaners they found and removed several gigabytes of unneeded files and apps on my Mac’s hard drive. I have used and reviewed them all, and each work very well. Click on their name here to read their reviews: MacKeeper, AppZapper, CleanMyMac, Speed4Mac, Onyx.
My personal favorite is MacKeeper, but all of the Mac cleaners mentioned above work similarly and all work well. Most of them are able to clean multiple things, which means you do not have to download several programs. That helps you save space too, so that you’re not having to add more data to your Mac’s already troubled hard drive. To choose the one that fits your needs the best, just look through what they include in their package.
Let’s RAM it UP!
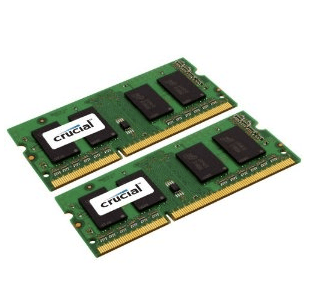
If you have tried some things to help lessen the load on your Mac’s RAM and they do not seem to be working, your only alternative may be to install some more RAM. This is most likely what you’ll need to do if you’re running Windows on Mac, especially if you’re using one of the Windows editions that needs more RAM, like Windows Pro or Ultimate, especially the 64 Bit.
The prices for RAM for Macs have dropped significantly in the past year. Some average prices are: 4GB kit $25-$40, and 8GB RAM kit $45-$100. You can find it the cheapest online at Crucial.com, Amazon, and other online discount stores. With Crucial.com there is the advantage of a compatability checker that assists you in getting the right RAM kit for whichever Mac you have.
If you’re going to install the RAM yourself, which is pretty easy to do, you should follow the instructions that come with the RAM kit and / or the directions from Apple. Apple has very detailed installation guides for each Mac on their support site. You can find them at these links:
- How to Remove and Install RAM on MacBook
- How to Remove and Install RAM on iMac
- How to Remove and Install RAM on MacBook Pro
Whether your reason for needing to upgrade RAM involves running a second OS on your Mac, or not, the frustrations are all the same. So, if it takes having to go the route of buying and installing more RAM, you’ll find that it was worth it. Your Mac will run smoother and faster as it did in its early days or like it did in its BW days (before Windows).
If you were able to buy yourself some time with a Mac cleaner, then that is awesome. Even if it bought you only a little time, make sure to keep the cleaner you decided to get as it will serve you well in keeping your Mac clean and running fast with the new RAM. For further help with running Mac on Windows, check out the series, especially the Troubleshooting article if you’re still experiencing any issues.
Remember to let us know your tips, tricks and other ideas for your RAM / memory issues, especially as they relate to running Windows on your Mac. They may just help another Mac user that’s in a predicament with their Windows on Mac!


